


The Ultimate Arduino Course: Programming & Electronics for Innovators
Overview Modern devices and smart systems are transforming industries, yet many learners struggle to understand how electronics, coding, and hardware …
4.8
4.8 Rating ( 2 Reviews )  33 Students
33 StudentsBestseller
Great Service
Highly Rated
Trending



Course Curriculum
| Section 1: Introduction | |||
| Unit 1: Instructor’s Introduction | 00:05:00 | ||
| Section 2: Simulating Arduino Boards and Testing the Code | |||
| Unit 1: Introduction | 00:01:00 | ||
| Unit 2: Downloading and Installing Proteus Software | 00:03:00 | ||
| Unit 3: Adding Arduino Library to Proteus | 00:05:00 | ||
| Unit 4: Downloading and Installing Arduino Coding Software | 00:05:00 | ||
| Section 3: Start Testing | |||
| Unit 1: Your First Code in Arduino Coding Software | 00:06:00 | ||
| Unit 2: Editing the Code and Getting the Hex File | 00:03:00 | ||
| Unit 3: Loading the Hex File and Running the Simulation | 00:04:00 | ||
| Section 4: Things You Need to Know | |||
| Unit 1: Introduction | 00:01:00 | ||
| Unit 2: What Is Arduino | 00:02:00 | ||
| Unit 3: The Holes in Board | 00:01:00 | ||
| Unit 4: How to Do It | 00:01:00 | ||
| Unit 5: The Breadboard | 00:05:00 | ||
| Unit 6: Arduino Thinking Process | 00:06:00 | ||
| Unit 7: Putting Together Your First circuit | 00:04:00 | ||
| Unit 8: Cut and Paste Coding | 00:04:00 | ||
| Unit 9: Circuit Diagram | 00:04:00 | ||
| Section 5: Practical Work | |||
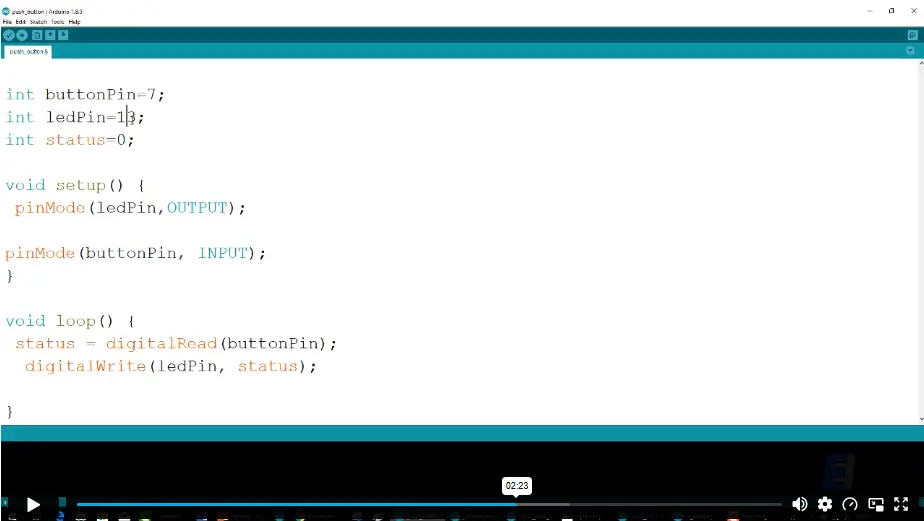
| Unit 1: Inputs: Buttons | 00:04:00 | ||
| Unit 2: Analog Input: Potentiometer | 00:04:00 | ||
| Unit 3: Analog Input: IR sensor | 00:04:00 | ||
| Section 6: Arduino v Raspberry Pi vs PIC Microcontroller | |||
| Unit 1: Introduction | 00:04:00 | ||
| Unit 2: What is Arduino Raspberry Pi and PIC Microcontroller | 00:06:00 | ||
| Unit 3: Quick Summary of the Main Differences | 00:05:00 | ||
| Unit 4: Hardware: Power and Connectivity | 00:03:00 | ||
| Unit 5: Hardware: IO Pins Storage and USB | 00:04:00 | ||
| Unit 6: Software Comparison | 00:05:00 | ||
| Unit 7: Expanding Onward Capabilities | 00:03:00 | ||
| Unit 8: Deciding Between the Three Options | 00:06:00 | ||
| Section 7: Make Your Own Arduino Board at Home | |||
| Unit 1: Introduction | 00:02:00 | ||
| Unit 2: Basic Parts Requirements | 00:02:00 | ||
| Unit 3: Parts Needed to Get the Job Done | 00:03:00 | ||
| Unit 4: Wire Up a Power Supply | 00:05:00 | ||
| Unit 5: ATMEGA Introduction | 00:03:00 | ||
| Unit 6: ATMEGA Connection | 00:07:00 | ||
| Unit 7: Arduino Ready | 00:05:00 | ||
| Unit 8: Bootloading Your Chips Optional | 00:06:00 | ||
| Unit 9: Finishing Up and Burning the Bootloader | 00:06:00 | ||
| Section 8: Connect and Interface Raspberry Pi with Arduino | |||
| Unit 1: Introduction | 00:03:00 | ||
| Unit 2: Raspberry Pi Connections | 00:03:00 | ||
| Unit 3: Raspberry Pi Configuration and Code | 00:06:00 | ||
| Unit 4: Arduino Configuration | 00:06:00 | ||
| Unit 5: Arduino Raspberry Pi Connection | 00:02:00 | ||
| Unit 6: Finishing Configuration | 00:07:00 | ||
| Unit 7: Completing the Python Setup | 00:05:00 | ||
| Unit 8: Final Step | 00:01:00 | ||
| Section 9: Arduino Web Control: Step by Step Guide | |||
| Unit 1: Introduction | 00:04:00 | ||
| Unit 2: Required Materials | 00:09:00 | ||
| Unit 3: Circuit Diagram | 00:06:00 | ||
| Unit 4: Code Overview | 00:04:00 | ||
| Unit 5: Code Explanation Part One | 00:04:00 | ||
| Unit 6: Code Explanation Part Two | 00:06:00 | ||
| Unit 7: Code Explanation Part Three | 00:05:00 | ||
| Section 10: Arduino Bluetooth | |||
| Unit 1: Introduction | 00:02:00 | ||
| Unit 2: Hardware and Software Components | 00:07:00 | ||
| Unit 3: Let’s Start Building | 00:04:00 | ||
| Unit 4: Working Procedure | 00:03:00 | ||
| Unit 5: Android Application | 00:08:00 | ||
| Unit 6: Note | 00:01:00 | ||
| Unit 7: Schematic | 00:02:00 | ||
| Unit 8: Code | 00:10:00 | ||
| Unit 9: Testing Code | 00:10:00 | ||
| Section 11: Arduino Radar | |||
| Unit 1: Introduction | 00:02:00 | ||
| Unit 2: Learning Objectives of This Course | 00:02:00 | ||
| Unit 3: Hardware Requirements | 00:03:00 | ||
| Unit 4: What is Arduino and Downloading Arduino Software | 00:05:00 | ||
| Unit 5: What is Ultrasonic Sensor | 00:03:00 | ||
| Unit 6: What is Servo Motor | 00:04:00 | ||
| Unit 7: Software Requirements Schematic | 00:08:00 | ||
| Unit 8: Arduino Code Explained | 00:06:00 | ||
| Unit 9: Processing Code + Java JDK | 00:07:00 | ||
| Section 12: Practical Assembly | |||
| Unit 1: Basic Parts Needed for This Project | 00:02:00 | ||
| Unit 2: Practical Assembly | 00:05:00 | ||
| Section 13: Arduino Motion Detector: Step by Step Guide | |||
| Unit 1: Introduction | 00:03:00 | ||
| Unit 2: Software and Hardware Requirements | 00:08:00 | ||
| Unit 3: Working Procedure | 00:02:00 | ||
| Unit 4: Circuit Diagram | 00:07:00 | ||
| Unit 5: Code Explained in Details | 00:08:00 | ||
| Section 14: Arduino Weather Station | |||
| Unit 1: Introduction | 00:03:00 | ||
| Unit 2: Things Used in This Project – Hardware | 00:03:00 | ||
| Unit 3: Things Used in This Project – Software and Web Editor | 00:08:00 | ||
| Unit 4: Temperature and Humidity Sensor Wiring | 00:04:00 | ||
| Unit 5: Code to Test DHT Sensors Using Serial Monitor | 00:05:00 | ||
| Unit 6: Code for LCD and DHT Sensor Together | 00:04:00 | ||
| Unit 7: Final Code for LCD RTC and DHT Sensor | 00:05:00 | ||
| Section 15: Automatic Irrigation System with Arduino | |||
| Unit 1: Introduction | 00:04:00 | ||
| Unit 2: Required Materials | 00:04:00 | ||
| Unit 3: Download and Install Arduino IDE | 00:09:00 | ||
| Unit 4: Circuit Diagram LCD Connection Explained | 00:05:00 | ||
| Unit 5: Circuit Diagram Continue | 00:03:00 | ||
| Unit 6: Working Procedure | 00:02:00 | ||
| Unit 7: Code Overview | 00:03:00 | ||
| Unit 8: Code Explanation | 00:05:00 | ||
| Section 16: Arduino Alarm Clock Using a Real Time Clock and LCD Screen | |||
| Unit 1: Introduction | 00:03:00 | ||
| Unit 2: Working Procedure | 00:02:00 | ||
| Unit 3: Circuit Diagram | 00:08:00 | ||
| Unit 4: Arduino Alarm Clock Code Part – 1 | 00:07:00 | ||
| Unit 5: Arduino Alarm Clock Code Part – 2 | 00:04:00 | ||
| Unit 6: Arduino Alarm Clock Practical Assembly | 00:04:00 | ||
| Section 17: Arduino Wireless Power Transmission | |||
| Unit 1: Introduction | 00:03:00 | ||
| Unit 2: Wireless Power Introduction History and Efficiency Chart Explained | 00:05:00 | ||
| Unit 3: How Wireless Power Works | 00:05:00 | ||
| Unit 4: Why We Need Wireless Electricity | 00:02:00 | ||
| Unit 5: Advantages and Disadvantages | 00:03:00 | ||
| Unit 6: Range of WiTricity and WiTricity Applications | 00:04:00 | ||
| Unit 7: How Safe is Wireless Electricity | 00:01:00 | ||
| Unit 8: Wireless Powered Arduino Project | 00:01:00 | ||
| Unit 9: Let’s Build It | 00:03:00 | ||
| Unit 10: Code and Troubleshooting | 00:05:00 | ||
| Unit 11: How Does This Circuit Work | 00:02:00 | ||
| Section 18: Arduino Multicolor RGB LED Lamp Controlled Using Bluetooth | |||
| Unit 1: Introduction | 00:01:00 | ||
| Unit 2: Course Requirements | 00:01:00 | ||
| Unit 3: Downloading and Installing Arduino | 00:07:00 | ||
| Unit 4: Components Explained | 00:10:00 | ||
| Unit 5: Assembly | 00:03:00 | ||
| Unit 6: The Code | 00:13:00 | ||
| Assignment | |||
| Assignment – Arduino | 00:00:00 | ||

1. What will I learn in this Arduino course? +
You will learn Arduino programming, electronics, automation systems, Bluetooth control, and project assembly techniques.
2. Is this course suitable for beginners? +
Yes, the course is beginner-friendly and explains Arduino concepts step by step.
3. Do I need coding experience before joining? +
No previous coding experience is required to start this course.
4. Will I learn Raspberry Pi integration in this course? +
Yes, the course includes lessons on connecting and interfacing Raspberry Pi with Arduino.
5. Can I build real electronic projects after completing the course? +
Yes, the course covers multiple Arduino-based projects and electronic system examples.
£29.99
£424
Exclusive Deal! 95% Off, Today Only!
Offer Ends Soon
 Take All courses for £49

This course includes:
 Access
 Level
Level
 Number of Units
 Duration
 Course Type
- Original price was: £424.00.£29.99Current price is: £29.99.
- 1 year
- Level 3
- Number of Units116
- Number of Quizzes0
- 8 hours, 24 minutes Gift this course
 14-Day Money-Back Guarantee
£29.99
/Unit Price
Exclusive Deal! 95% Off, Today Only!
Discounted Total:£145.00
Quantity:
Buying more than one of the same courses?
- 50% discount for orders of 10+ courses
- 60% discount for orders of 50+ courses
- 70% discount for orders of 100+ courses
Looking for a more personalised package?
Contact Us Now